
Virtual Network Computing |
|
|
|
|
|
|
WinVNC - The Windows NT VNC server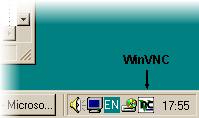 WinVNC
is a VNC server that will allow you to view your Windows desktop from any
VNC viewer. Because Windows in its present, standard incarnation, only
supports a single graphical user being logged in at any one time, WinVNC
makes the existing desktop of the PC available remotely, rather than creating
a separate desktop. It is only fair to emphasise this: VNC does not
make an NT machine into a multi-user server in the same way that Citrix-based
software, for example, does. A single NT machine can therefore be accessed
by multiple users, but if they all connect at the same time they will all
see the same desktop! WinVNC
is a VNC server that will allow you to view your Windows desktop from any
VNC viewer. Because Windows in its present, standard incarnation, only
supports a single graphical user being logged in at any one time, WinVNC
makes the existing desktop of the PC available remotely, rather than creating
a separate desktop. It is only fair to emphasise this: VNC does not
make an NT machine into a multi-user server in the same way that Citrix-based
software, for example, does. A single NT machine can therefore be accessed
by multiple users, but if they all connect at the same time they will all
see the same desktop!
WinVNC will run on Windows 95, Windows NT 4.0 and on any future Win32-based systems, without the need to replace any system files or run any OS-specific versions of the program. It is a standard application that can be run from the Start... menu and closed down just as easily. WinVNC can also be run as a service, which means that you can log in remotely, do some work, and log out again. See below for more details. And, of course, WinVNC is free. We hope that making the source code available will enable programmers who know more about the internals of Windows than we do to suggest improvements to any and all aspects of WinVNC. InstallationWinVNC is fairly simple to install and even easier to use. Installation involves the following steps:
Using WinVNCOn starting, WinVNC will add a small, green version of the VNC icon to the system task bar. Clicking on this icon with the right mouse button will cause a menu to be displayed, with the following options on it:
WinVNC PropertiesThe following options are available from the Properties dialog.Incoming Connections
Note that clicking in a window will generally cause it to be updated, so if you have certain applications which don't update very well, try this!
WinVNC - Advanced SettingsExtra options have been added to WinVNC for use primarily by system administrators, to tailor the server's behaviour to meet their particular needs. The options are DWORD values which can be set in the system registry, and tools such as the Windows Policy Editor can be used to apply these settings across a large number of machines.Versions 3.3.2 R5 and later use a more sophisticated organisation of these options to allow more flexibility. WinVNC will now look for them in the following places:
HKEY_LOCAL_MACHINE\Software\ORL\WinVNC3\ HKEY_LOCAL_MACHINE\Software\ORL\WinVNC3\Default HKEY_LOCAL_MACHINE\Software\ORL\WinVNC3\<username> HKEY_CURRENT_USER\Software\ORL\WinVNC3 Advanced Options:
By default, all WinVNC servers will not accept incoming connections unless the server has had its password field set to a non-null value. This restriction was placed to ensure that misconfigured servers would not open security loopholes without the user realising. If a server is only to be used on a secure LAN, however, it may be desirable to forego such checking and allow machines to have a null password. Setting this registry value to zero will disable null-password checking by WinVNC. Local machine-specific setting. AllowLoopback
AllowProperties
AllowShutdown
AutoPortSelect
CORBAConnect
DebugLevel
DebugMode indicates which logging methods to use,
DebugLevel indicates how much debug information to present. Any positive integer is valid. Zero indicates that no debugging information should be produced and is the default. A value of around 10-12 will cause full debugging output to be produced. Local machine-specific setting. ConnectPriority
ConnectPriority indicates what WinVNC should do when a non-shared
connection is received:
This is a Local machine-specific setting. InputsEnabled
LockSetting
Password
PollUnderCursor, PollForeground, PollFullScreen,
OnlyPollConsole, OnlyPollOnEvent
PortNumber
SocketConnect
VNCHooks - Advanced SettingsWinVNC uses a special library, VNCHooks, to hook into the other running applications and retrieve notifications of areas of the screen being changed. The VNCHooks library uses the messages sent to visible Windows to decide which areas need considering for update. Not all applications use the same method of updating the screen, so you can tweak the method used by WinVNC for particular applications by editing the registry. All the entries listed can be found underHKEY_CURRENT_USER\Software\ORL\VNCHooks\Application_Prefs
When a window recieves a message, (WM_PAINT), indicating that it should repaint itself, it is possible to find out precisely which regions have changed, so that WinVNC need only scan those for potential updates,increasing efficiency. However, this can cause graphical glitches occasionally, particularly when an application scrolls the contents of its window, in which case only the revealed section of the window is marked as needing to be updated. If these glitches prove to be a problem then edit the <appname>\use_GetUpdateRect entry in the registry. A value of one indicates that this optimisation will be used, while a value of zero indicates that it will not.
A number of Windows applications, most notably the Clock program, use WM_TIMER events to trigger updates to their displays, rather than WM_PAINT messages. By default, timer messages are not used to notify WinVNC of potential updates, since many programs use timer events for purposes other than updating the screen. As a result, the clock and a few other applications don't normally update correctly under WinVNC. The fix to this is to edit the <appname>\use_Timer entry in the registry. A value of one indicates that WM_TIMER messages will trigger WinVNC updates, while a value of zero indicates that they will not.
Some Windows applications write characters directly to the screen when a user types into a window, rather than using WM_PAINT messages to cause the text to be redrawn. To fix this, WinVNC can scan the window every time a key is pressed, in order to catch the change. To set this value for a problem application, edit the <appname>\use_KeyPress entry in the registry. A value of one indicates that key presses will cause updates, while a value of zero indicates that they will not.
Some Windows applications update the display directly in response to mouse clicks, without using intermediate WM_PAINT messages, for example. In order to catch such updates, it is necessary to trigger WinVNC to update the relevant window whenever the left mouse button is released. To set this value for a problem application, edit the <appname>\use_LButtonUp entry in the registry. A value of one indicates that left-button clicks will cause updates, while a value of zero indicates that they will not. The same rules apply to the middle and right buttons using the appropriate value name.
The VNCHooks library catches messages sent to windows before they are dealt with by the window. As a result, sending an update message to WinVNC to indicate the potential change can result in WinVNC sending the updated area to the client before it has actually been redrawn by the application! This is a common problem, especially on multiprocessor versions of NT, so deferred updates are used by default. Deferred updates are handled by posting a custom message back into the window's own message queue rather than posting to WinVNC directly. By the time this custom message is seen again by the VNCHooks library, the message that caused it will have been handled and the update can then be forwarded to WinVNC without danger of being handled prematurely. A few programs don't handle these extra messages in their queue very well, so this optimisation is optional. It can be set by editing the <appname>\use_DeferredUpdate entry in the registry. A value of one indicates that deferred updates will be used, while a value of zero indicates that they will not. Running WinVNC as a serviceWinVNC can now be made to run as a service process under both Windows NT and Windows 95, by following the instructions outlined below. You can also send Ctrl-Alt-Del to the server, allowing you to unlock a locked workstation, for example, when WinVNC is running as a service on NT. The service support is still in the early stages of development, and the following 'features' should also be pointed out:Windows NT 'features':
D:\> C:
C:\Program Files\ORL\VNC> winvnc -install Windows 95 : The WinVNC service is now running and is installed to run whenever the system boots up into Windows 95. Windows NT : The WinVNC service is installed and set up to run whenever the machine is booted into Windows NT but IS NOT YET RUNNING! You can run and stop the WinVNC service using the control panel, or using "net start" and "net stop" C:\> net start winvnc Open a command prompt and move into the directory into which you installed WinVNC, as described in part 2) above. Use the -settings option to cause the service to display its Properties dialog. C:\Program Files\ORL\VNC> winvnc -settings NOTE : Windows NT : The settings used by the winvnc service are the Default user settings and are stored per-machine, rather than on a per-user basis as is done when running WinVNC normally. Access for all users will be controlled by the one machine-specific password. NOTE : Windows 95 : If Win95 has been set to use different settings for each user then the settings used are those of the currently logged in user. If no user is logged in or Win95 is set to use the same settings for all users then the settings used are the Default user settings and are stored per-machine, rather than on a per-user basis as is done when running WinVNC normally. (Under Win95, pressing Cancel on the login dialog gives access to the Default user settings.) Open a command prompt and move into the directory into which you installed WinVNC. Use the -remove option, which will automatically stop the service and then remove it, and show a dialog box to indicate the success or failure of the operation. C:\Program Files\ORL\VNC> winvnc -remove NOTE : Failure to remove the service usually indicates that it was not installed in the first place!
-run Causes WinVNC to run normally
& ignore rest of command-line.
If no options are given then WinVNC runs normally. Multiple option may
be given, so, for example, to upgrade from a running copy of WinVNC to
a new one, you could use:
Running on other Win32 systemsWinVNC runs fine on NT3.51 but the absence of a system tray means that the Properties dialog cannot be accessed. In addition, Ctrl-Alt-Del from clients cannot be correctly interpreted under NT 3.51, limiting WinVNC's usefulness when run as a service on this platform. It also runs on NT5 beta.If you have a choice we recommend NT4.0 with the latest service packs
installed.
|
||||||||||||||
|
For comments, feedback, etc, please see the 'Keeping
in touch' page.
|
||||||||||||||||